September 30, 2026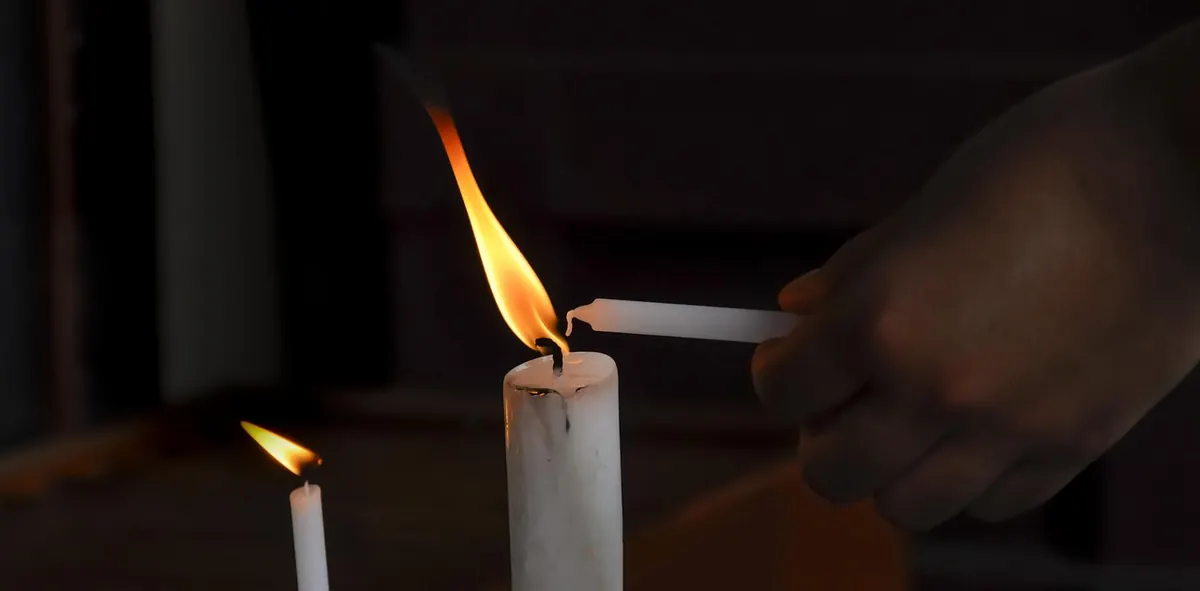
Title: 10 Candle Care Mistakes That Shorten Burn Time
A candle looks simple: wax, wick, flame. In practice it is a small combustion system, and it works best when the wick, the melt pool and the surrounding air stay in balance. Break that balance and you pay for it in wax. A jar that should have given you forty evenings gives you twenty, with half the wax welded to the glass.
None of the ten mistakes below look dramatic on their own. That is exactly why they are so easy to keep making. Most of them cost nothing in the moment — a flame blown out instead of snuffed, one more episode while the candle keeps burning — and everything over the life of the jar.
1. Letting the Wick Grow Long
A wick that is too long pulls more wax than the flame can burn cleanly. The flame grows tall and restless, soot gathers on the rim of the jar, and the wax level drops noticeably faster. Trim to roughly an eighth to a quarter of an inch before every burn, not just when the wick looks shaggy.
The mushroom-shaped cap that forms on the tip is your clearest signal. That cap is carbon, and once it appears the wick is already past its working length. If you can see a curl or a black knob, cut it off.
How to trim so it actually happens:
- Trim when the candle is cool. A warm wick smears and frays instead of cutting cleanly.
- A wick trimmer, small sharp scissors or nail clippers all work. Length matters more than technique.
- Trim over a bin or the sink, never over the candle. Clippings that fall into the melt pool turn into charred specks.
- If the wick leans, straighten it while the wax is soft, then trim once it has firmed up again.
- New candles are not always ready to burn. Check the wick on the first lighting too.
- Keep the trimmer beside the candle. The tool you cannot find is the tool you skip.
2. Skipping the First Full Melt Pool
The first burn sets the footprint for every burn that follows. Light a fresh candle for twenty minutes and the pool never reaches the edge of the jar. On the next lighting, the flame follows that smaller circle and tunnels straight down the middle, leaving a ring of untouched wax that will never catch up. Let the first burn run until the melted wax reaches, or very nearly reaches, the wall of the container. For a standard jar that is usually two to three hours; wide or multi-wick candles can take longer. Start them on an evening you are staying in.
Memory matters here. Wax has a long one. A pool that has already set narrow tends to re-form narrow, burn after burn, which is why an early mistake keeps costing you hours for the rest of the candle's life.
If a candle has already tunneled
You can often even it out. Wrap the jar loosely in foil, leaving a small opening at the top, and burn for an hour or two. The trapped heat softens the high walls so the pool can spread. A candle warmer or melting lamp will also use up wax a wick cannot reach, and it works well on jars that have tunneled past saving. Neither trick restores a candle completely, but both recover a surprising amount of wax you would otherwise scrape out with a knife and throw away.
3. Blowing Out the Flame Instead of Snuffing It
Blowing out a candle undoes a good burn in one second. The puff sprays a fine mist of molten wax across the surface and up onto the rim, where it cools into a film you will spend the next burn trying to melt back down. The wick usually bends into the pool as well, so the next lighting starts crooked.
Use a snuffer, a wick dipper, or simply put the lid back on. A snuffer starves the flame of oxygen; a dipper pushes the wick into the melt pool and straightens it in the same motion. Wait until the wick stops glowing orange before you walk away, and leave the lid off for a few minutes so condensation does not form on the inside of the glass.
4. Burning in a Draft
Air movement is the quiet thief. A ceiling fan, an open window, a heating vent or a busy doorway all push the flame sideways, and a tilted flame burns the wax unevenly. One side of the jar melts early, the other stays stubbornly solid, and the wick drifts off center. The flame also flickers, smokes and burns hotter than it should, which shortens the candle from both ends.
The fix is placement, not effort. Move the candle out of the airflow rather than turning down the fan for the whole evening. A corner, a shelf against a solid wall, or a spot behind a lamp all work.
If the flame will not stand still, the candle is in the wrong room.
5. Burning in Marathon Sessions
A candle is not a lamp. Burning for more than four hours at a stretch overheats the container, softens the wick, and pushes the melt pool past what the wick was sized to handle. Fragrance oil burns off faster, the flame swells, and the wax disappears at almost double the rate of a normal session.
Four hours is the working ceiling; two to three is gentler still. Snuff the candle, let it cool completely, trim the wick and start again. You will get more total hours, not fewer, out of the same jar.
6. Letting Debris Collect in the Wax
Dust, pet hair, a stray wick clipping, the burnt head of a match — anything sitting in the melt pool becomes fuel the wick was never sized for. It flares, smokes, and leaves specks of char that clog the wick and dull the flame for every burn afterward.
Cover the candle when it is not in use. A lid, an upturned coaster or a clean glass works fine. Before lighting, check the surface and pick out anything foreign. If the wax looks cloudy with dust, wipe the surface with a dry paper towel.
7. Storing Candles Badly
Heat and sunlight are not kind to wax. A candle kept on a sunny windowsill or left in a hot car can soften, sweat fragrance oil, and warp so the wick is no longer straight — all before you have burned it once. Soy and coconut blends are especially prone to this.
- Store upright, in a cool, dark cupboard, ideally below 25°C / 77°F.
- Keep the lid on to hold in fragrance and keep dust out.
- Do not stack heavy items on top of jars; wax dents and wicks bend.
- Wax can shrink slightly from the glass over long storage. A short, gentle first burn settles it back.
8. Trimming Too Short, or Ignoring Wick Position
Overcorrecting is its own mistake. A wick cut to a sixteenth of an inch or less can drown in the melt pool, giving you a weak, guttering flame that tunnels or goes out on its own. If you trim too short, wait a burn for the wick to grow back, or pour off a little melted wax to lower the pool around it.
Position matters just as much. If the wick sits off center, the pool will be off center too. Straighten a leaning wick while the wax is warm — right after you snuff, while the pool is still liquid — then trim once it has cooled.
9. Burning Past the Last Half Inch of Wax
The final half inch is not free wax. It is the buffer between the flame and the bottom of the container. Burning it down can crack the glass, scorch the shelf underneath, or singe whatever the jar is sitting on. When the wax stops covering the base of the wick entirely, the candle is finished.
Scrape the remainder out with a warm spoon and use it in a wax warmer or melting pot. You keep the scent, use every drop, and skip the risk entirely.
10. Treating Every Candle the Same
Wicks are matched to wax type, jar diameter and fragrance load. A three-wick candle in a wide bowl needs different handling than a slim pillar; a soy blend behaves differently from paraffin; a heavily fragranced candle may need a longer first burn before the pool reaches the edge. The general rules above apply to all of them, but the specific numbers — trim length, session length, total hours — shift from candle to candle.
Read the label or the product page. Most makers state an expected burn time, which gives you a benchmark. If your candle is running well under that figure, one of the mistakes above is usually the reason.
How Long Should a Candle Actually Last?
A rough rule of thumb: a candle burns at about seven hours per ounce of wax in good conditions. A 7 oz jar is around forty hours; a 14 oz jar closer to eighty. Those numbers assume a trimmed wick, a full first melt pool, no drafts and sessions of four hours or less. In practice, most people lose 20 to 30 percent of the advertised burn time to one or two of the mistakes above — and they blame the candle rather than the habit.
A Two-Minute Routine That Saves Hours
- Before lighting: trim the wick to an eighth to a quarter of an inch, clear the surface of debris, and check that the wick stands straight and centered.
- Choose the spot: away from fans, vents, windows and doorways, on a heat-safe surface.
- First burn only: stay with it until the pool reaches the edge of the jar.
- Every session: keep it under four hours.
- At the end: snuff or dip the wick rather than blowing it out, and cover the jar once it has cooled.
None of this takes long. Trim, position, wait, snuff, cover — five small acts that decide whether your candle burns down evenly or buries half its wax against the glass. Look after the flame and the candle looks after itself.
Photo: Pexels / Pixabay